A Fun Oil Cloth Project

Today I made a fun and easy project from two old padded card table chairs that I found in the basement. These two chairs are at my studio now with a small table I purchased at IKEA last month. I also cut a 39” circle from a coordinating oilcloth for a tablecloth. Here’s how I did it.

Supplies Needed:
2 old padded card table chairs
2 cans Rust-Oleum 2X Ultra Cover Paint+ Primer (one can per chair) - I used Magenta Satin
2/3 yard of a bright colored oilcloth (1 yard if your chair has a padded backrest, mine didn’t)
Rubber Leg Tips (my chairs were missing two in back)
Staple Gun
Screwdriver or Wrench to remove covered seat (and back rest if your chairs have one)
Scissors
Drop Cloth
First, make sure your chairs are free from dirt, dust and cobwebs. Then remove the screws holding the padded seat (and backrest, if applicable) in place. Set padded parts and screws aside.
Also remove any broken leg tips before painting. You may want to just remove them all, so they all match. I forgot to do this step, so I now have new tips only on the back legs where they were missing. I didn’t want to remove the front tips after I painted and run the risk of chipping the paint or having the new tips not cover all of the unpainted area.
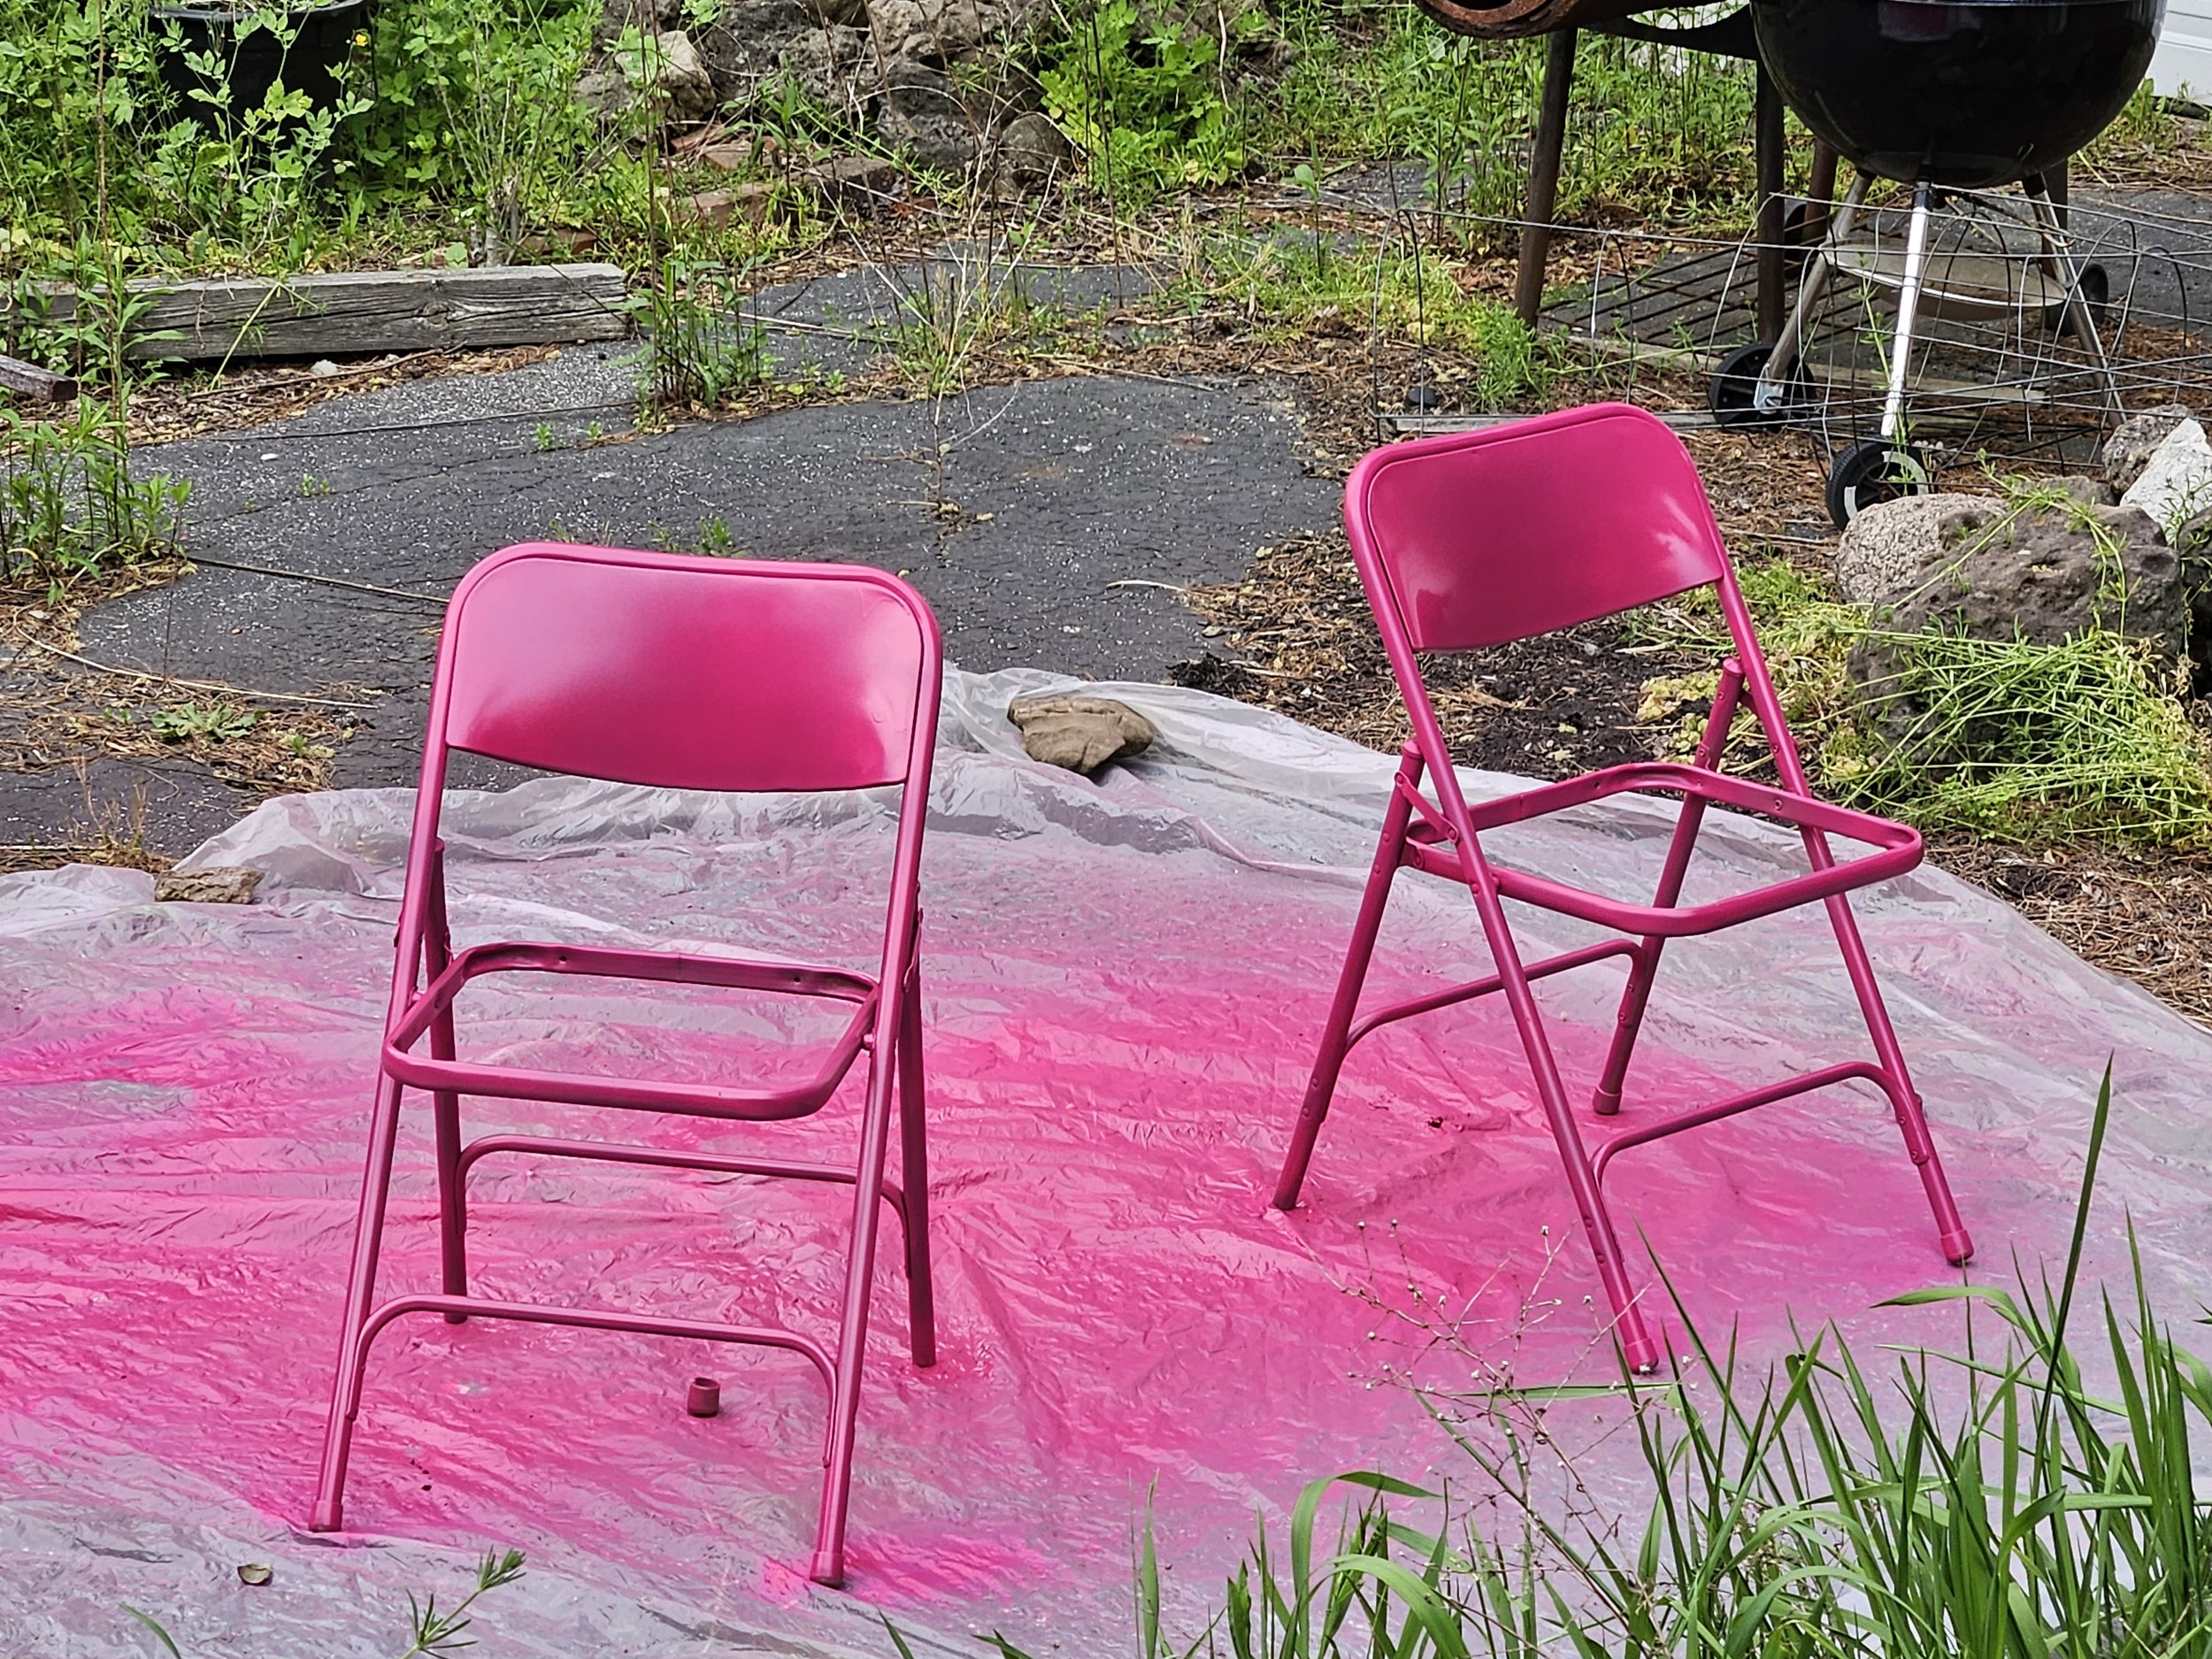
Outside, on a drop cloth (unless you want a pink driveway or grass), put two coats of paint on the chairs following the directions on the can of paint. This actually took four steps since I had to flip the chairs upside down to cover all areas with the chairs open. I allowed the paint to dry for 20 minutes between each step.

The next step is to cover the padded chairs. I cut two pieces of oilcloth, one for each chair and large enough to wrap around and under the seats, with about 2” - 4” beyond the bottom edge of the chair. This extra will get trimmed away later, but you will need it to pull the fabric taunt before stapling. You may want to play with the placement of the design on the seat front so you don’t end up with a major motif off to the side and all background in the center. Check all of this before cutting any of your fabric!

With the oilcloth face down on the table, lay the seat on top so that the bottom of the seat is facing up. Pull the edges of the oilcloth around to the bottom of the seat and staple in place. To get the oilcloth taunt, staple the opposite sides first in the center. Staple one side, then stretch and staple the opposite side. Repeat this step on the top and bottom.
After you have a staple on each side and the top and bottom of the cushion, you can work around one corner at a time. Do the center of opposite corners first, stretching to make taunt. Then complete each corner always pulling to eliminate pleats. More staples are needed on the corners. Your goal is to get a nice smooth corner with no pleats.

When you come to the bracket that holds the screws to attach the seat to the chair frame, you will need to trim away some of the extra fabric. Be sure you don’t cover the bracket screw holes.
Add some extra staples on each side.
After you have attached the oilcloth all of the way around the seat, you can trim the excess fabric and discard it.

Now you are ready to attach the seats to the chair frame when it is completely dry. It may be a good idea to paint the frames in the evening and let them dry overnight before re-attaching the upholstered seats.
After you are done attaching the seats, put a rubber leg tip on any legs that need a new tip. And voila! You have two pretty, bright and colorful chairs for your office, studio, kitchen or patio.
Stop by the studio this weekend for my Grand Re-Opening, Friday and Saturday, May 19 and 20, from 10 a.m. - 4 p.m. and see the chairs in person. I have lots of oilcloth for sale, if you want to try this at home.